在学习redis分布式锁的时候, 需要用到集群
下面是相关配置
配置多个springboot
打开idea , 点击

点击Edit Configurations...
然后点击 右边空白中的 Add new run configuration...

然后填写相关的配置信息
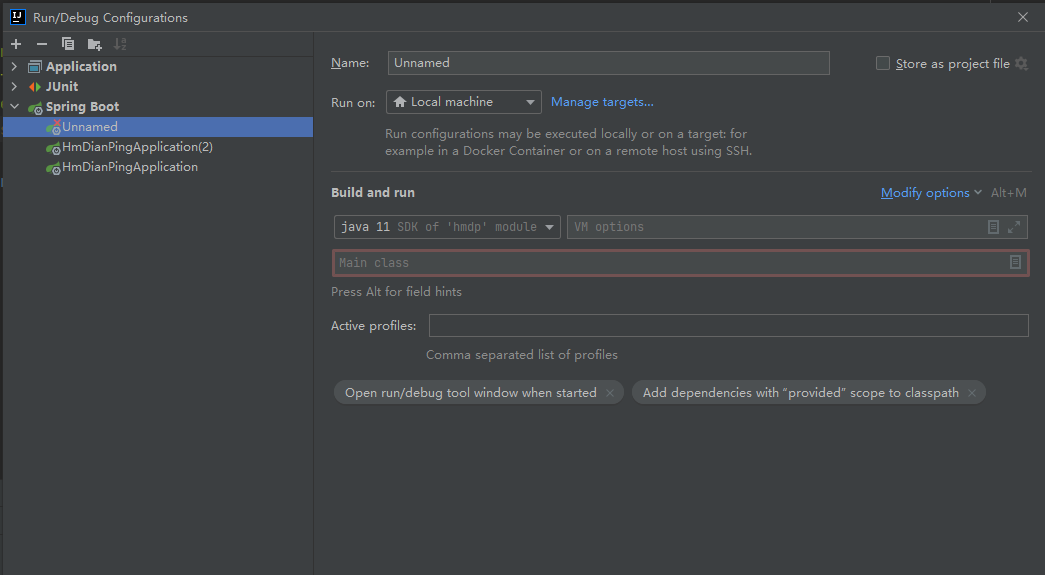
注意需要修改端口号, 否则会造成
这里设置Name 为 MoreSpringboot
Main class 选择springboot的启动类, 这里就是com.hmdp.HmDianPingApplication
注意要把类名写全
然脏在 VM options 位置填入 -Dserver.port=8082
这个就是运行参数, 设置端口号避免端口冲突,
然后点击apply
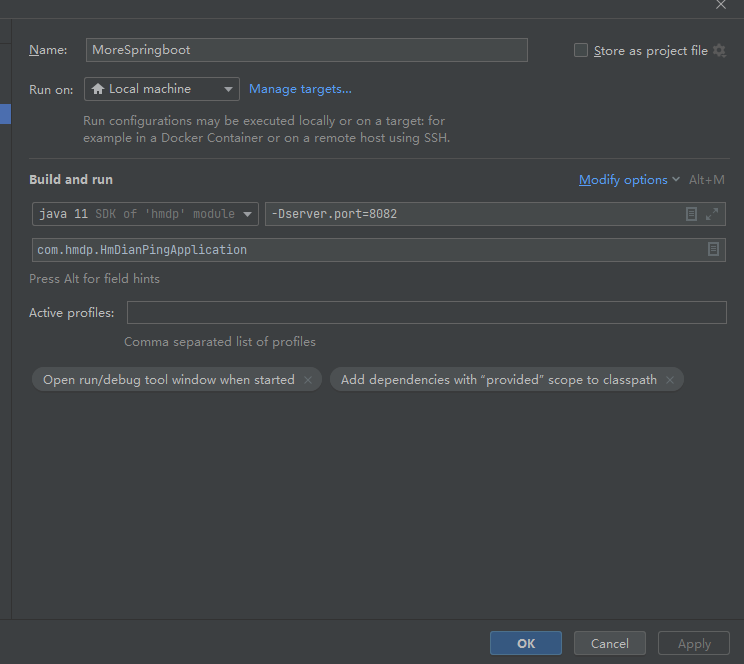
可以看到此时已经多了一个MoreSpringboot

右键点击Run
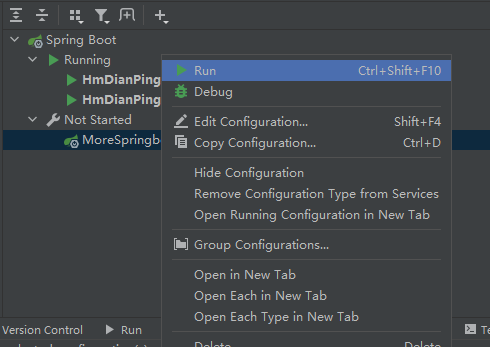
可以看到springboot启动成功

修改nginx配置
由于这个工程前端使用Nginx代理,
因此需要去Nginx的配置文件中更改相关配置
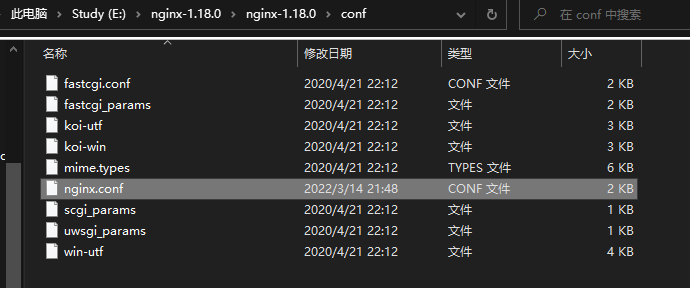
打开nginx.conf

修改相关配置设置负载均衡
1
2
3
4
5
6
7
8
9
10
11
12
13
14
15
16
17
18
19
20
21
22
23
24
25
26
27
28
29
30
31
32
33
34
35
36
37
38
39
40
41
42
43
44
45
46
47
48
49
50
51
52
53
| worker_processes 1;
events {
worker_connections 1024;
}
http {
include mime.types;
default_type application/json;
sendfile on;
keepalive_timeout 65;
server {
listen 8080;
server_name localhost;
# 指定前端项目所在的位置
location / {
root html/hmdp;
index index.html index.htm;
}
error_page 500 502 503 504 /50x.html;
location = /50x.html {
root html;
}
location /api {
default_type application/json;
#internal;
keepalive_timeout 30s;
keepalive_requests 1000;
#支持keep-alive
proxy_http_version 1.1;
rewrite /api(/.*) $1 break;
proxy_pass_request_headers on;
#more_clear_input_headers Accept-Encoding;
proxy_next_upstream error timeout;
# proxy_pass http://127.0.0.1:8081;
proxy_pass http://backend; # 注意这个地方, 需要与下面的对应
}
}
# 这里是关键配置
upstream backend {
server 127.0.0.1:8081 max_fails=5 fail_timeout=10s weight=1;
server 127.0.0.1:8082 max_fails=5 fail_timeout=10s weight=1;
server 127.0.0.1:8083 max_fails=5 fail_timeout=10s weight=1;
}
}
|
weight表示负载的多少, weight越小负载分配越小
server 127.0.0.1:8083 max_fails=5 fail_timeout=10s weight=1;
重新加载nginx nginx.exe -s reload
测试集群
编写controller代码
1
2
3
4
5
6
7
8
9
10
| @Slf4j
@RestController
public class TestController {
@GetMapping("/test")
public Result test(){
log.info("测试集群");
return Result.ok("测试成功!");
}
}
|
使用的测试工具是postman
创建测试
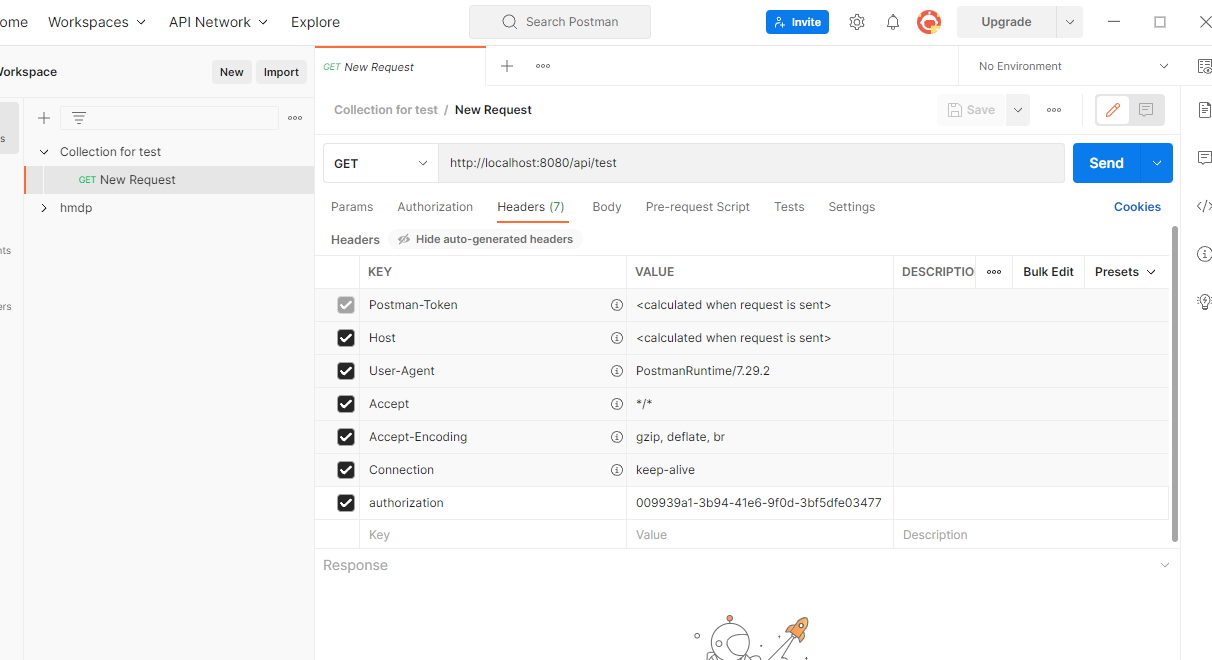
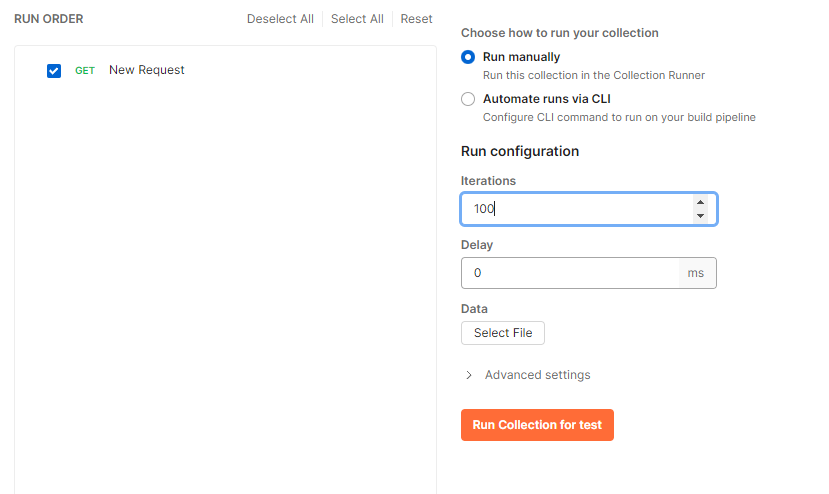
设置100个线程发送请求
查看后端日志
可以发现三个springboot均已生效


可能遇到的问题
nginx配置没有生效
确认修改配置之后, 注意location 要与下面的多个端口 / url 对应
可以先测试单个端口是否成功, 逐步排查问题


